To learn how this particular site was implemented, read along. If you are short on time, the TLDR is that I use the Zola static site generator and some HTML/CSS templates.
Selecting the tech-stack
When starting a project, the first step is to choose a toolbox. It has been a while since I did web development and back then I mainly worked with dynamic, server-side rendered pages (Rails, Node, Phoenix). However, such a stack feels like a bit of an overkill for presenting mostly static content.
To find the correct tools, let's first step back and look at the requirements I had for this website:
- The site should be simple and cheap to host. Changing providers should be trivial.
- It should be relatively simple to post new content.
- Privacy is a concern. I only present content, there is no need for any cookies.
- While I am at it, I would like to create a photography website and technical blog in one go to save some work.
- It should be pretty, especially the photo portfolio.
- Knowing how many people visit and what articles are popular would be nice.
Looking at the requirements and doing some googling, a static site generator seemed like the best choice. It generates plain HTML right on my laptop, thus avoids the need for databases and code execution on the backend. This is perfect, both for cheap hosting and privacy. Serving static files is really the minimal service you can get from a hoster and having no logins/databases means that I can avoid potential security and privacy issues.
With this basic plan set and some more research, I collected all the pieces needed to build the page. Here is an overview, with each being detailed in the next sections:
- Start with HTML5 UP templates and customize them as needed for the layout.
- Integrate the Zola static site generator for rendering posts as HTML templates.
- Host the generated files on netlify.
- Add plausible analytics for privacyfriendly site metrics.
Splitting the photography page and software blog
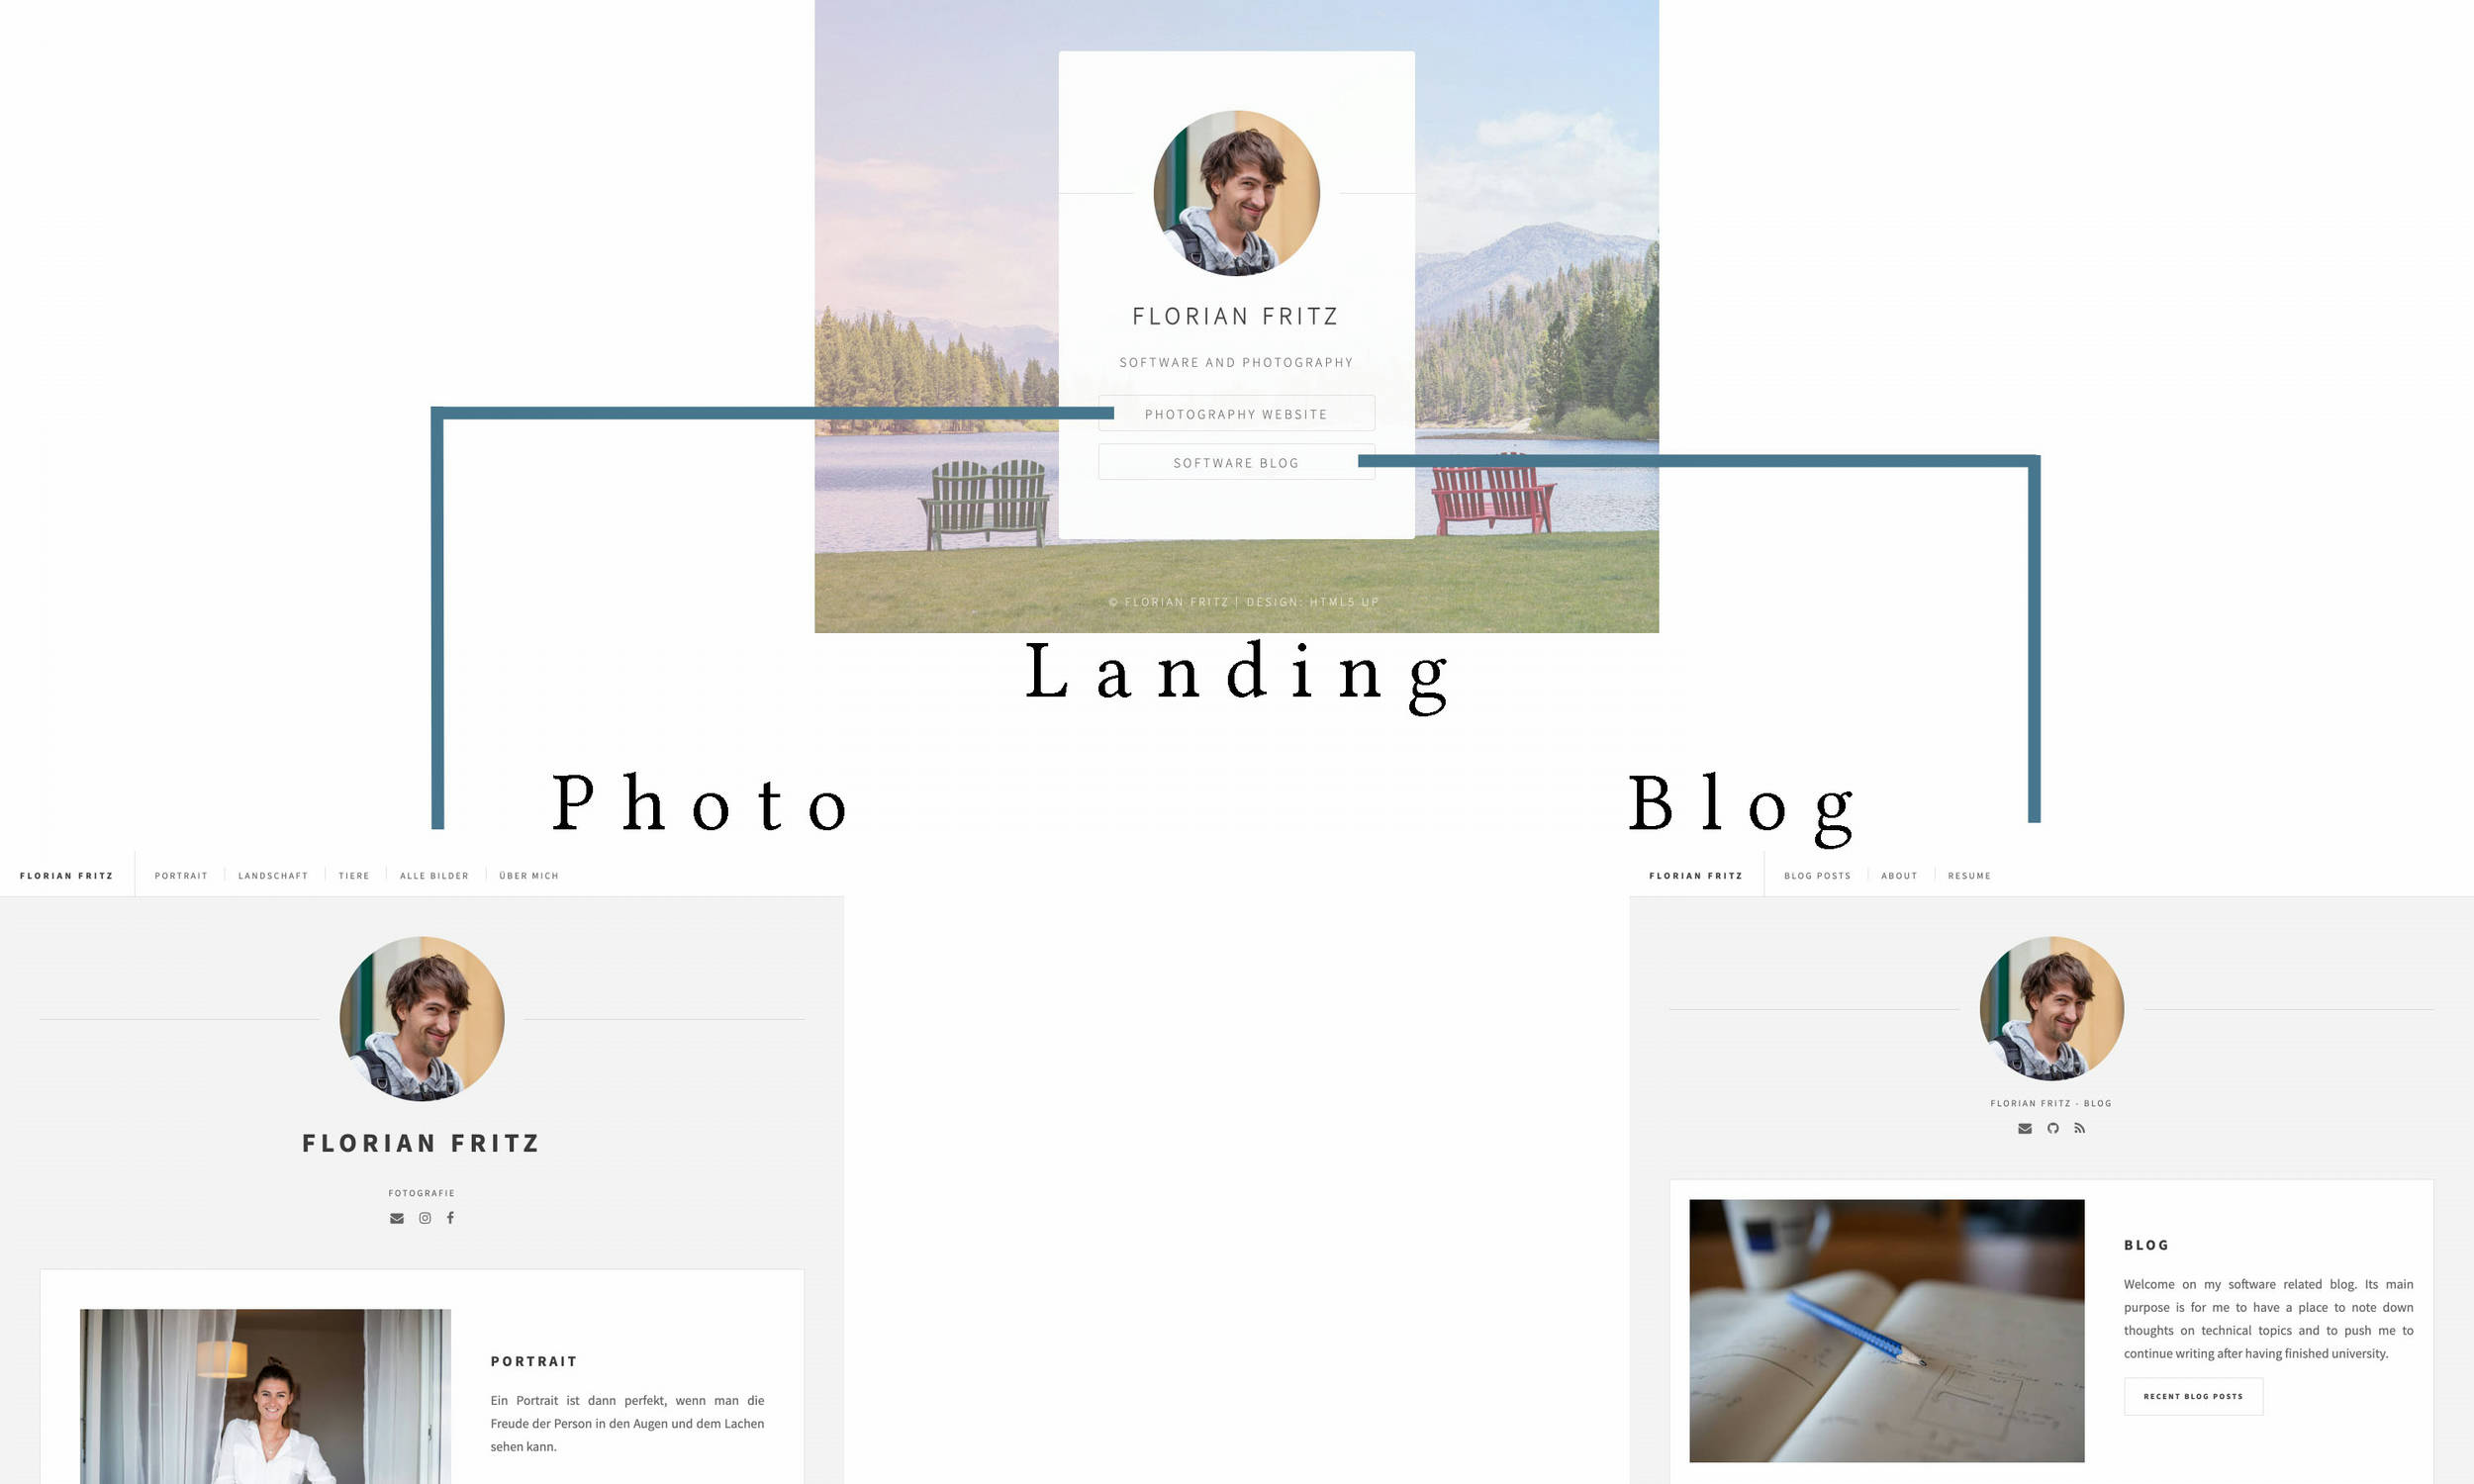
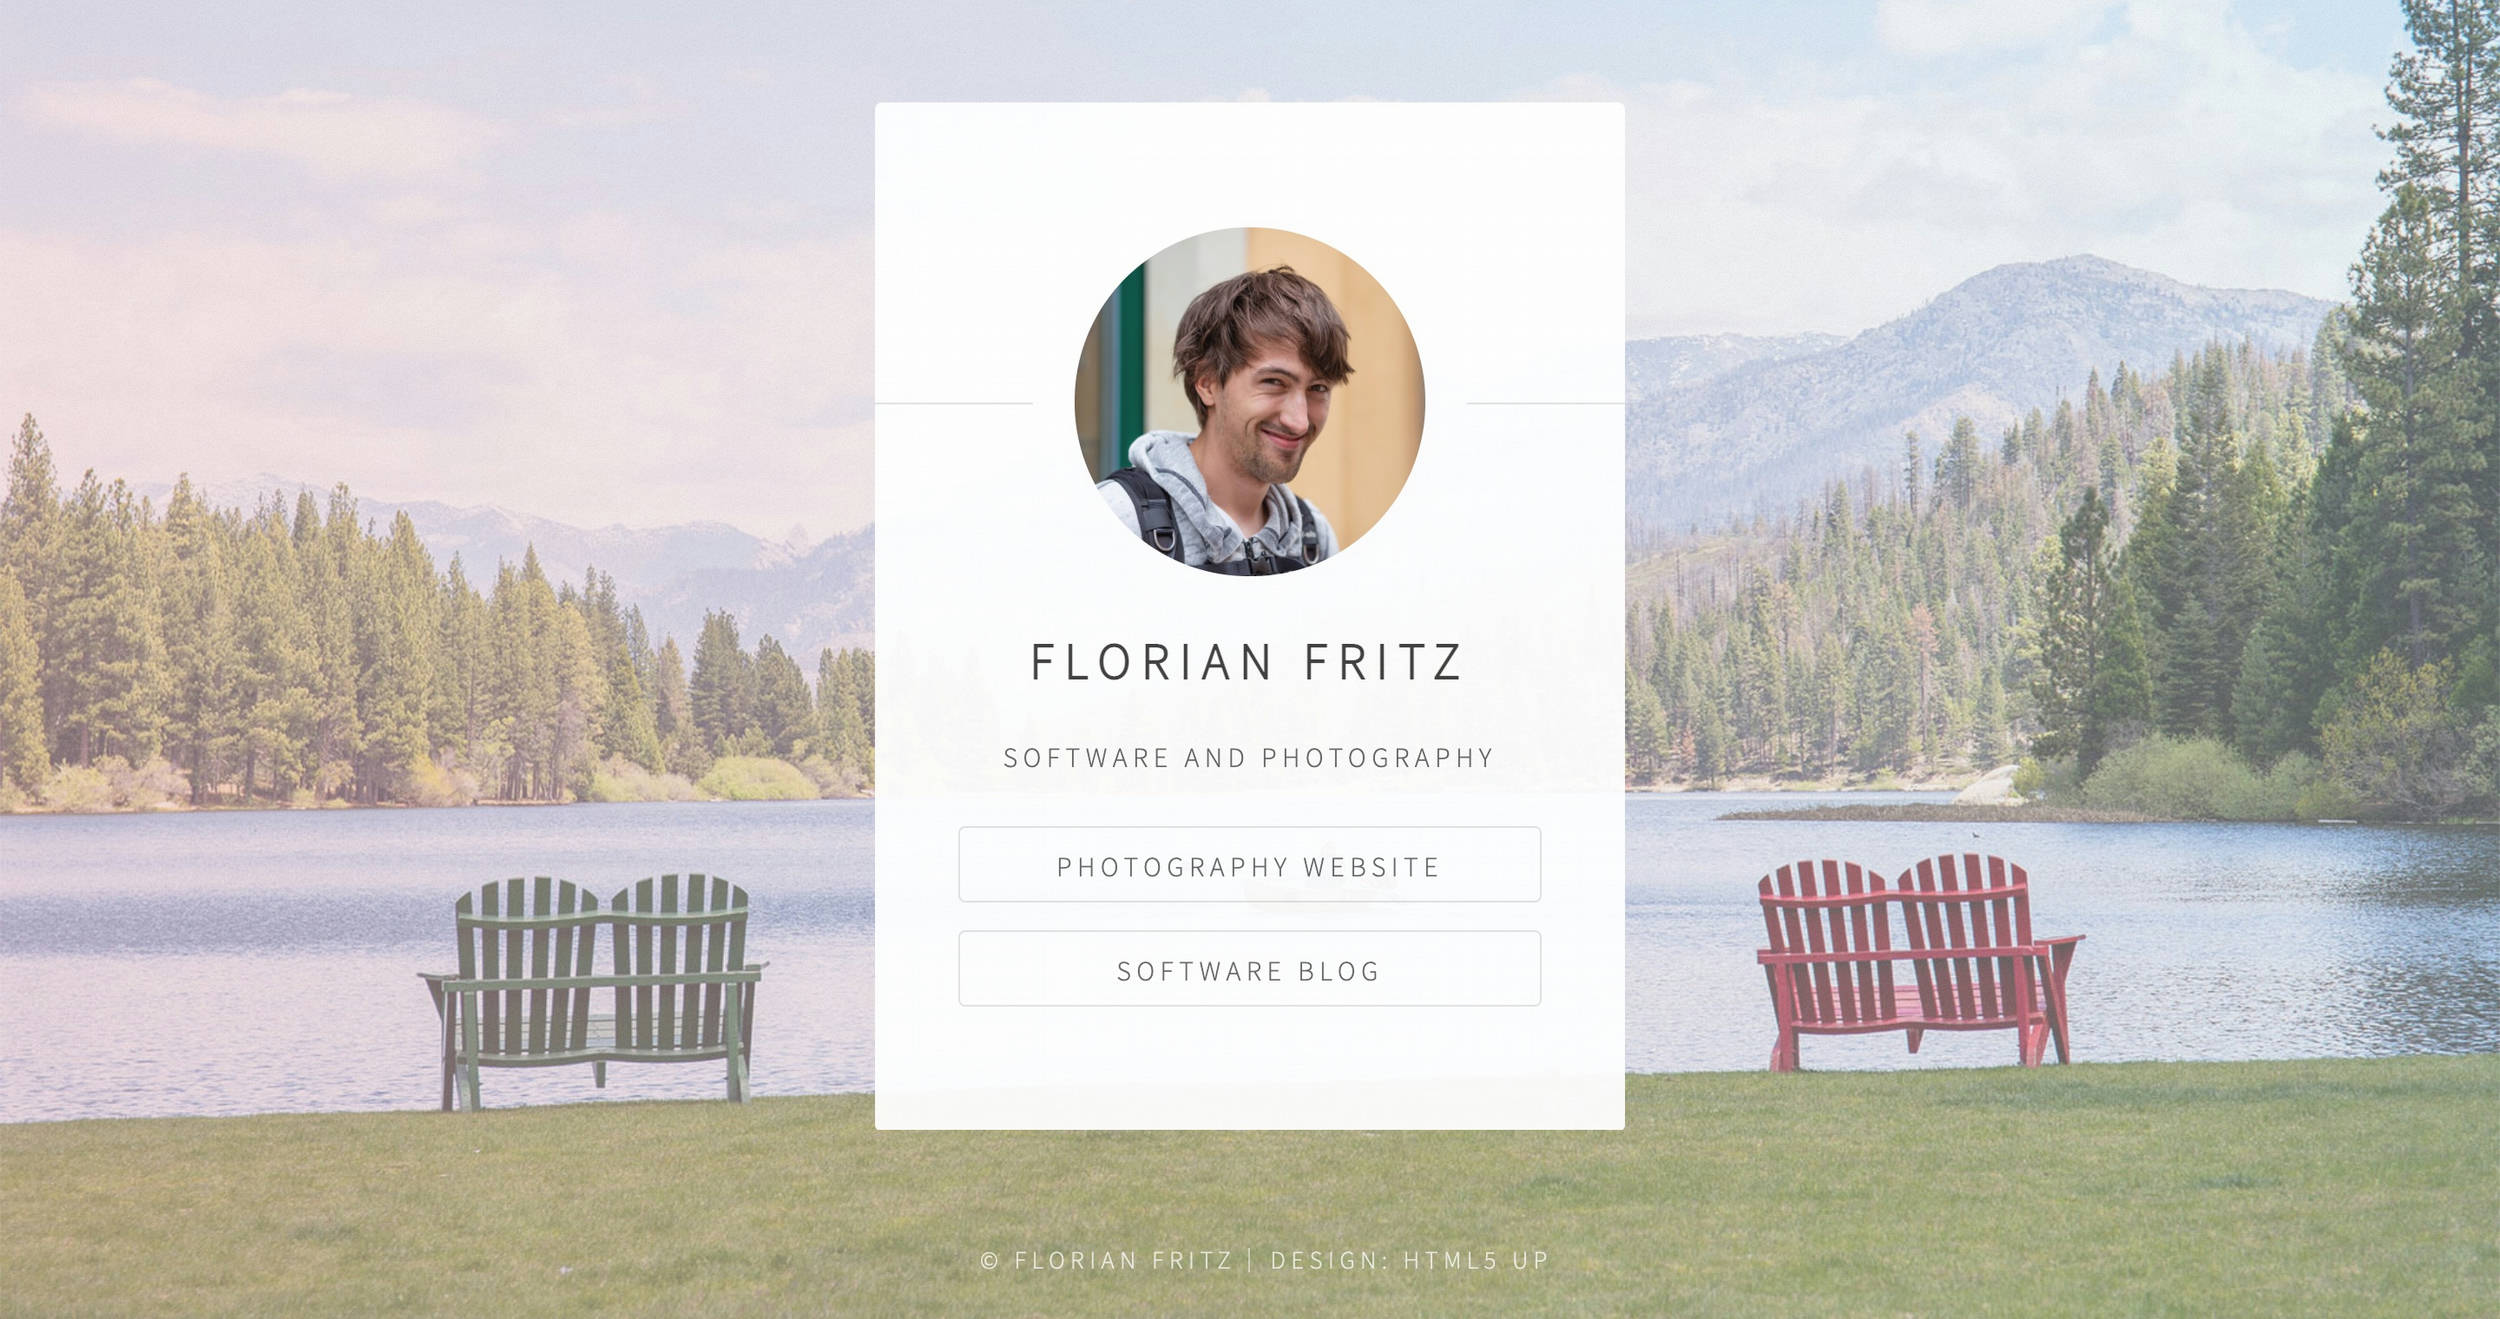
This led to the separation as shown in the image. A landing page is presented on the root domain florianfritz.net, redirecting visitors to either foto.florianfritz.net or blog.florianfritz.net. All three pages are completely separate, i.e. they do not directly share assets and are hosted self-contained on own subdomains. This allows me to customize them without affecting each other. I might for example want to host the blog on GitHub pages, but keep the photo site with big assets on netlify. Also, the layout of the photo portfolio and of the blog will likely diverge from each other with time.
You might have noticed, that while the pages are separate, they still look really similar. That is because I base both on the same initial template to save work (and because I think it looks fantastic). With that said, let's move on to the detailed design of the pages.
HTML5 Up templates and customization
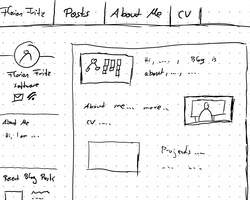
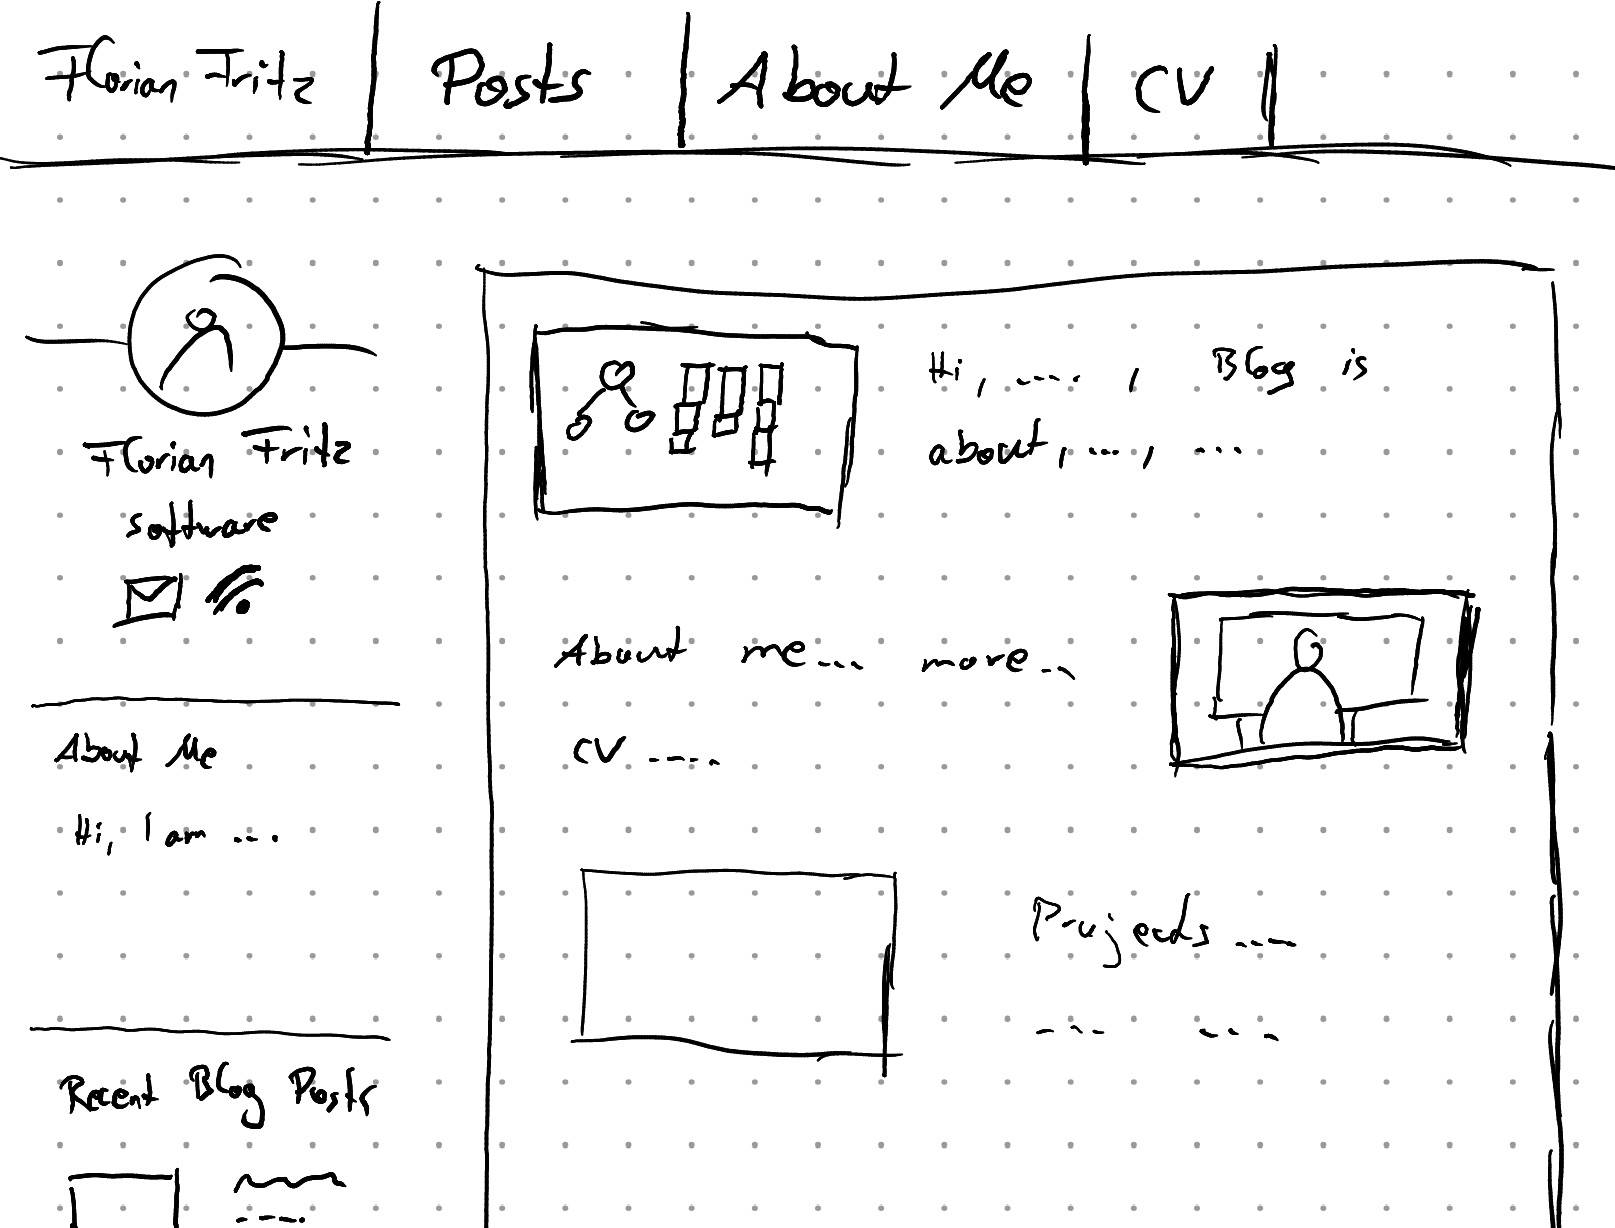
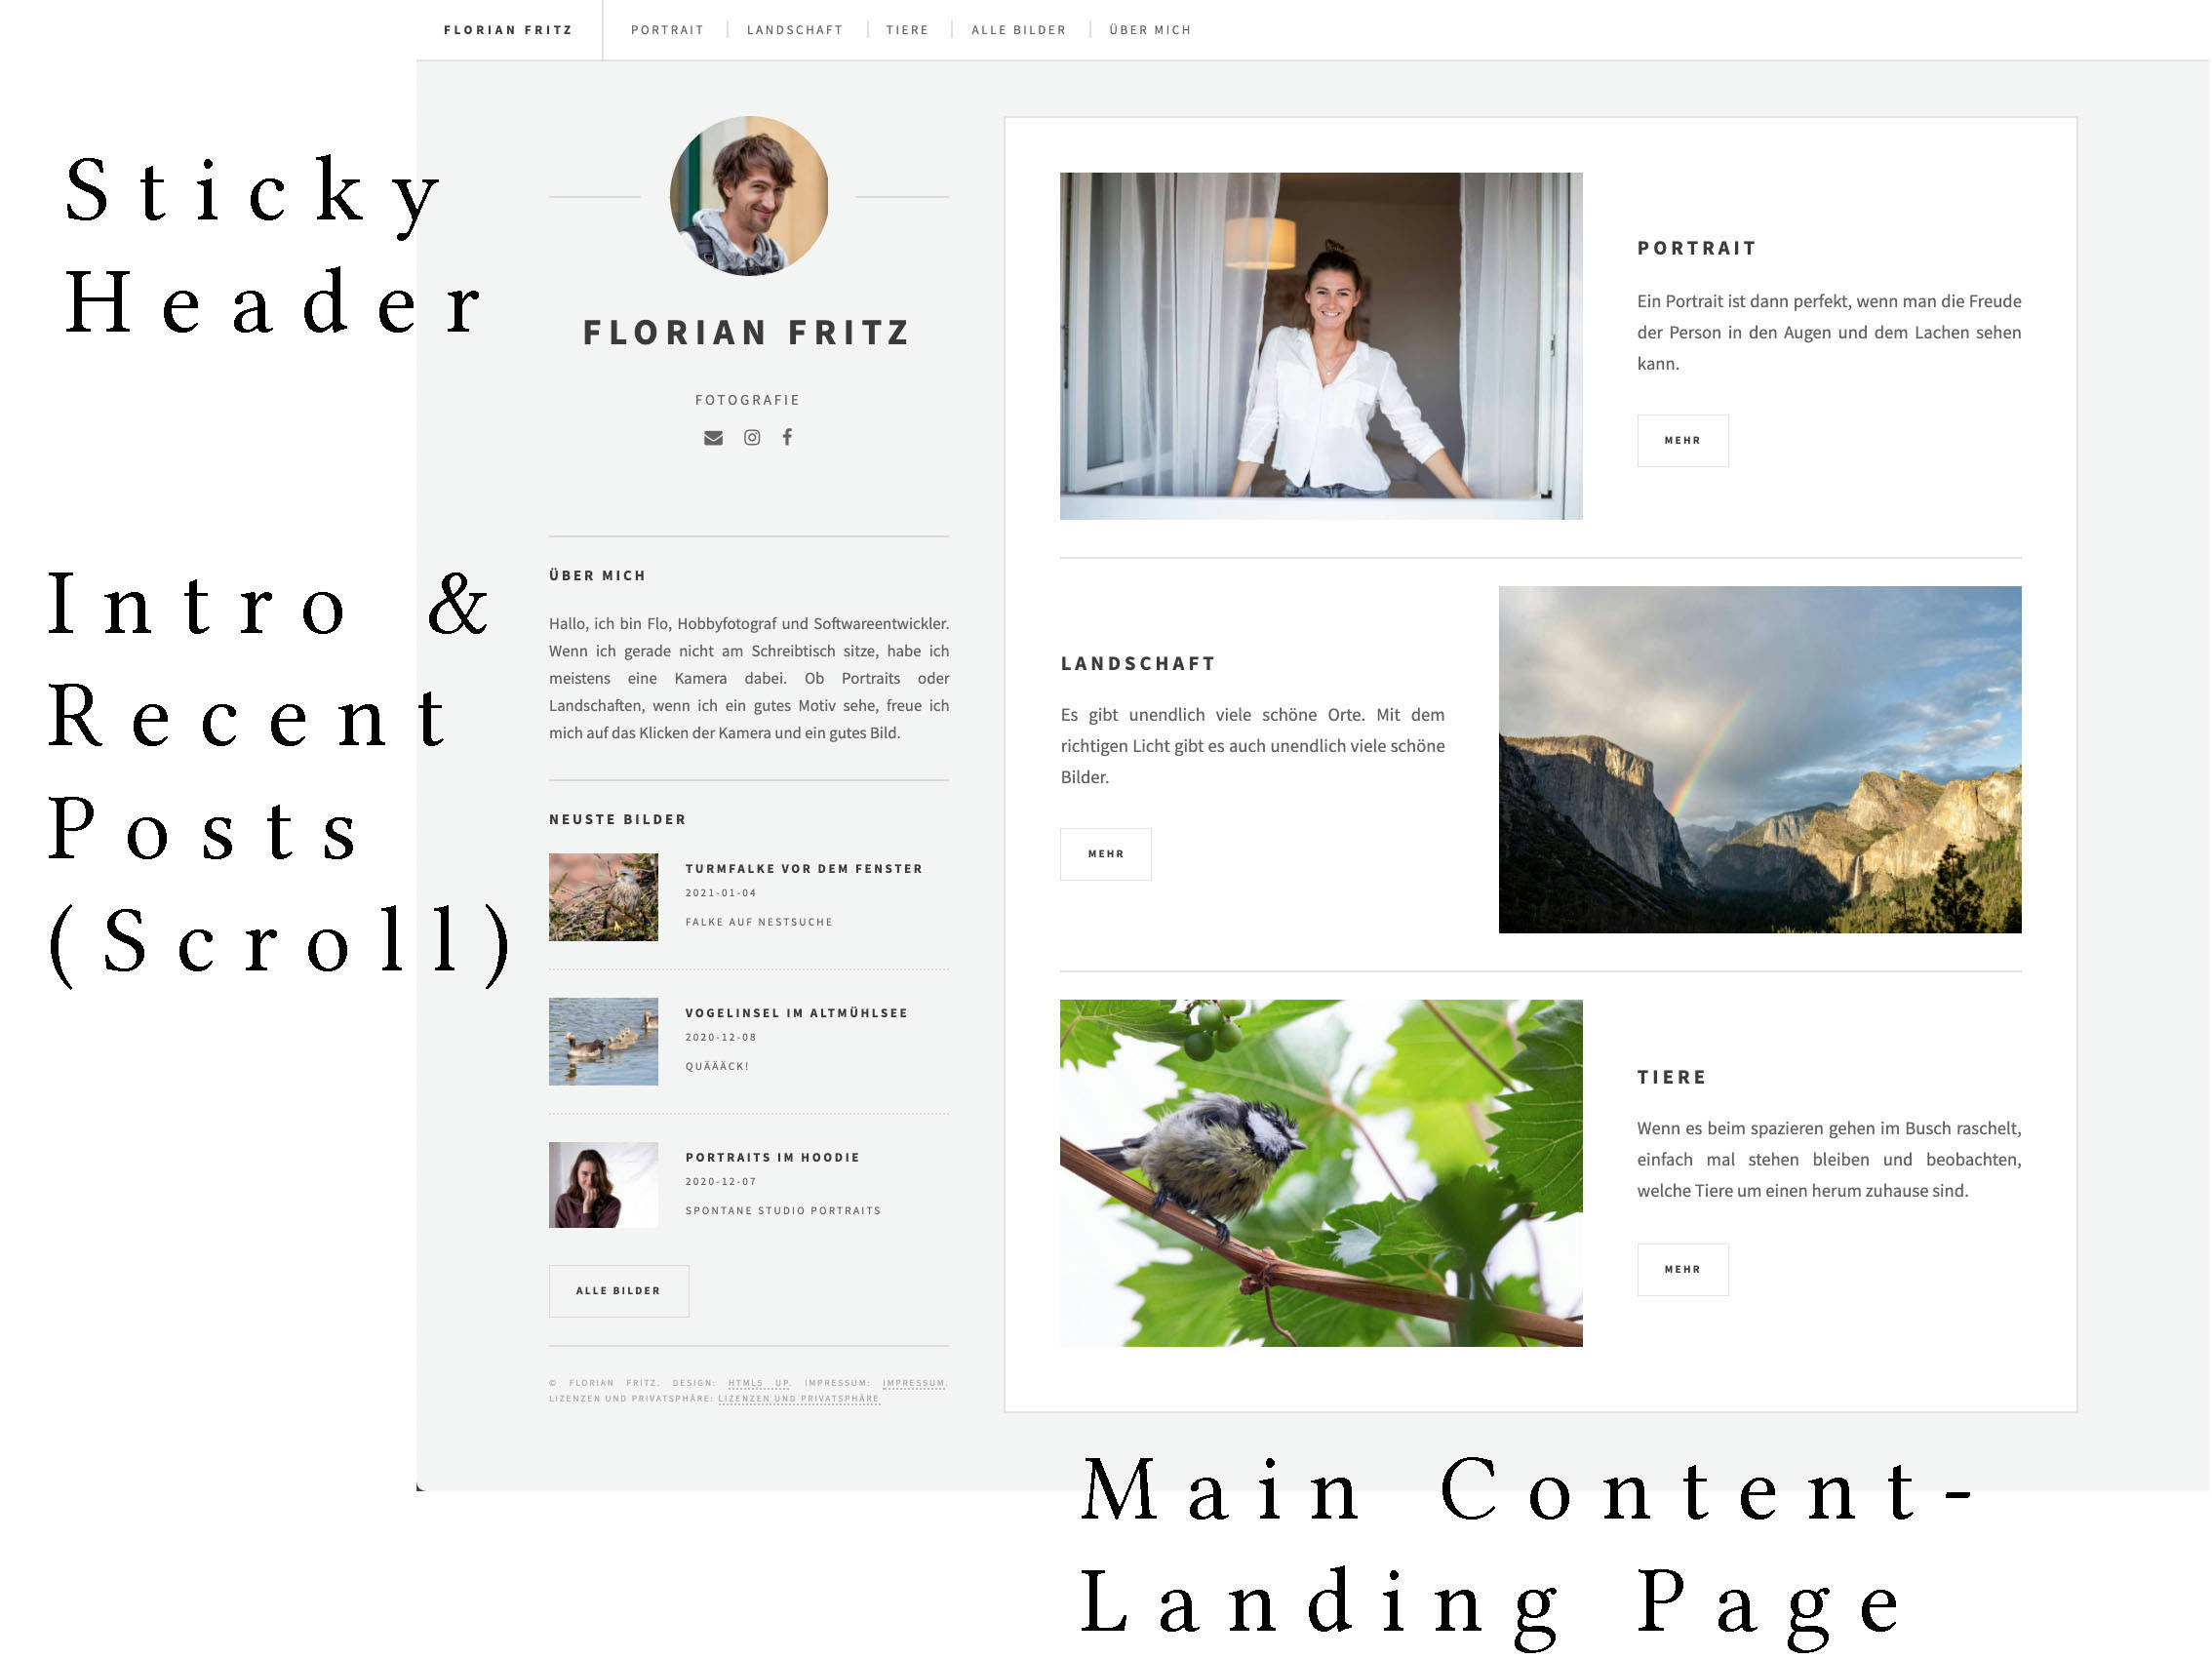
To get a head start on the overall structure of the site, I browsed various templates online. I really liked the look of all HTML5 UP templates. Therefore, I decided to use their identity template as a base for the landing page and the future imperfect template for the two main pages. While these look good as they are, I still needed to do some customizing for them to fully fit my needs.
For the main future imperfect template, I needed to do some more modifications. It is designed to list recent posts on the landing page. However, especially for the photography site, I want to highlight my best work and only present recent posts as secondary content. Because of this, I reworked the landing page and added other, non-post related pages for individual highlights.
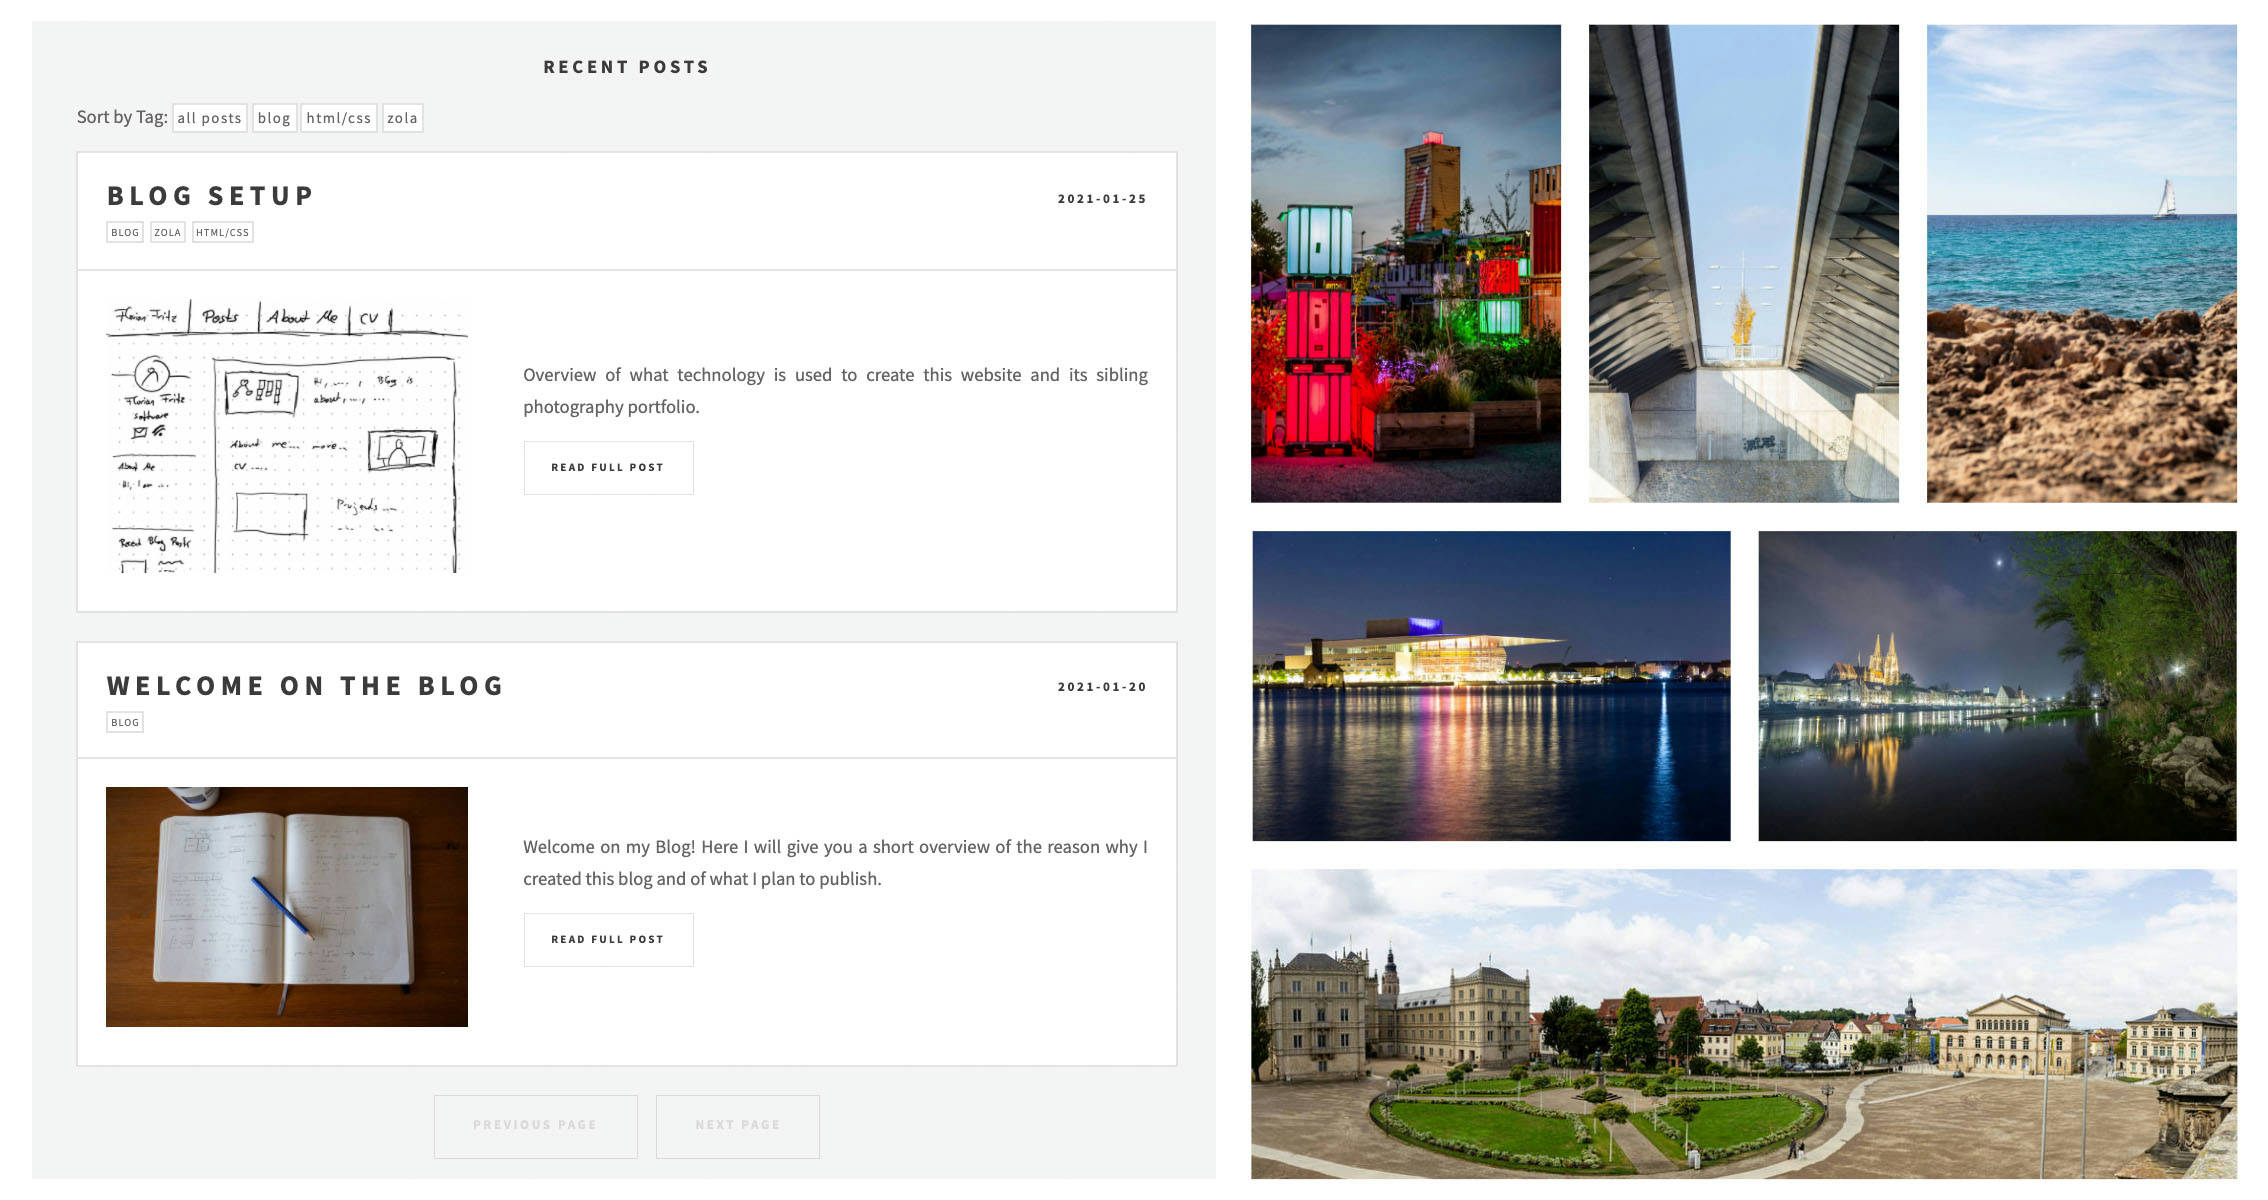
To highlight some of the divergences between the two sub-pages (photo and blog), you can see the tag system on the left side of the image below. For the software blog, I decided that it is important to filter by topic, as someone might for example be interested on all posts regarding C++. Thus, the blog post overview page and each individual post shows tags that you can click to filter for only matching posts.
When talking about images and the layout of the page, we must not overlook mobile devices and a responsive design. The layout simplifies on smaller screens, showing only the main content area. This is done by moving the content of the sidebar below the main content. Additionaly, the top menu bar collapses to a hamburger menu. Most of this was present in the initial template.
The last point of customizing the templates was to introduce responsive images for different device sizes and to declutter the page: I removed all JS, unneeded icons and some not used CSS. With these changes, the page loads fast and gets excellent lighthouse scores.
Zola static site generator
Getting started with Zola is easy enough. In case you worked with any HTML templating system before, you will feel right at home. You separate your website into the 'outer base' that is always present (top menu bar, sidebar, footer) and a content area that changes with sub-pages. For static pages, like e.g. the landing or the about page, I simply prepared the content in plain HTML and use Zola to add the 'outer base' page around the content. For posts, I then actually used the blogging part of Zola. Therefore, writing a post requires me to copy a folder and edit some markdown mixed with some HTML image tags to get the left/right floating images. Below you can see the beginning of this post's .md file.
+++
title = "Blog Setup"
draft = true
[taxonomies]
tags = ["blog", "zola", "html/css"]
[extra]
intro = "Overview of what technology..."
time = "10"
+++
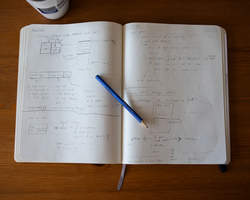
<span class="image right">
{ responsive_image(path="posts/2021-01-30_technical-about/title.jpg", alt="Sketch of Website Layout") }
</span>
I wanted to build a personal website for quite some time now.
This really should ...
## Selecting the tech-stack
When starting...
Simple enough for not getting in the way when writing content. Getting Zola to render the markdown, create lists of posts and add tags to posts was straightforward following its documentation. It required some googling to get e.g. the recent-post list in the sidebar to work, but nothing unsolvable. Also, Zola can scale your images out of the box. I wrote a macro to automatically generate responsive images for different screen sizes. While requiring some tinkering, this works quite well now. Overall, the experience was, while not perfect, good enough for me.
The main 'pain point' with Zola for me was its template system when you try doing something that is not 'in-line' with the standard use case. Zola uses the Tera template system. At first glance, it looks like what you are used to from Ruby or Elixir web development. You can add code snippets inside your content to e.g. loop over an array of content. However, as Rust is a compiled language, the code snippets are just a DSL, not 'real' code. When you try expressing more complex logic, this really shows. For example, short codes (kinda like macros) can not be nested. Honestly, I think you should choose a template system that features a full programming language. However, this separation between compiled and interpreted languages, and what issues arise from this are enough content for another post2. Just be aware of this limitation, then Zola is simple to use and really fast.
Hosting on netlify
At this point I got a public folder holding all my HTML/CSS/image files. Going from here to a public website is a blaze with netlify. Create an account, configure your DNS entries, drag and drop the folder to upload...and, well, all done!
Netlify provides 100 GB of traffic for free, configures an SSL cert for you and if you re-upload changes, it only transmits changed files. There really is nothing more to say here, I am super happy with it for my purposes. Yes, there are other solutions that are cheaper with high traffic, but as long as netlify does the job for me, I see no reason to put any more work into publishing the page.
Plausible analytics
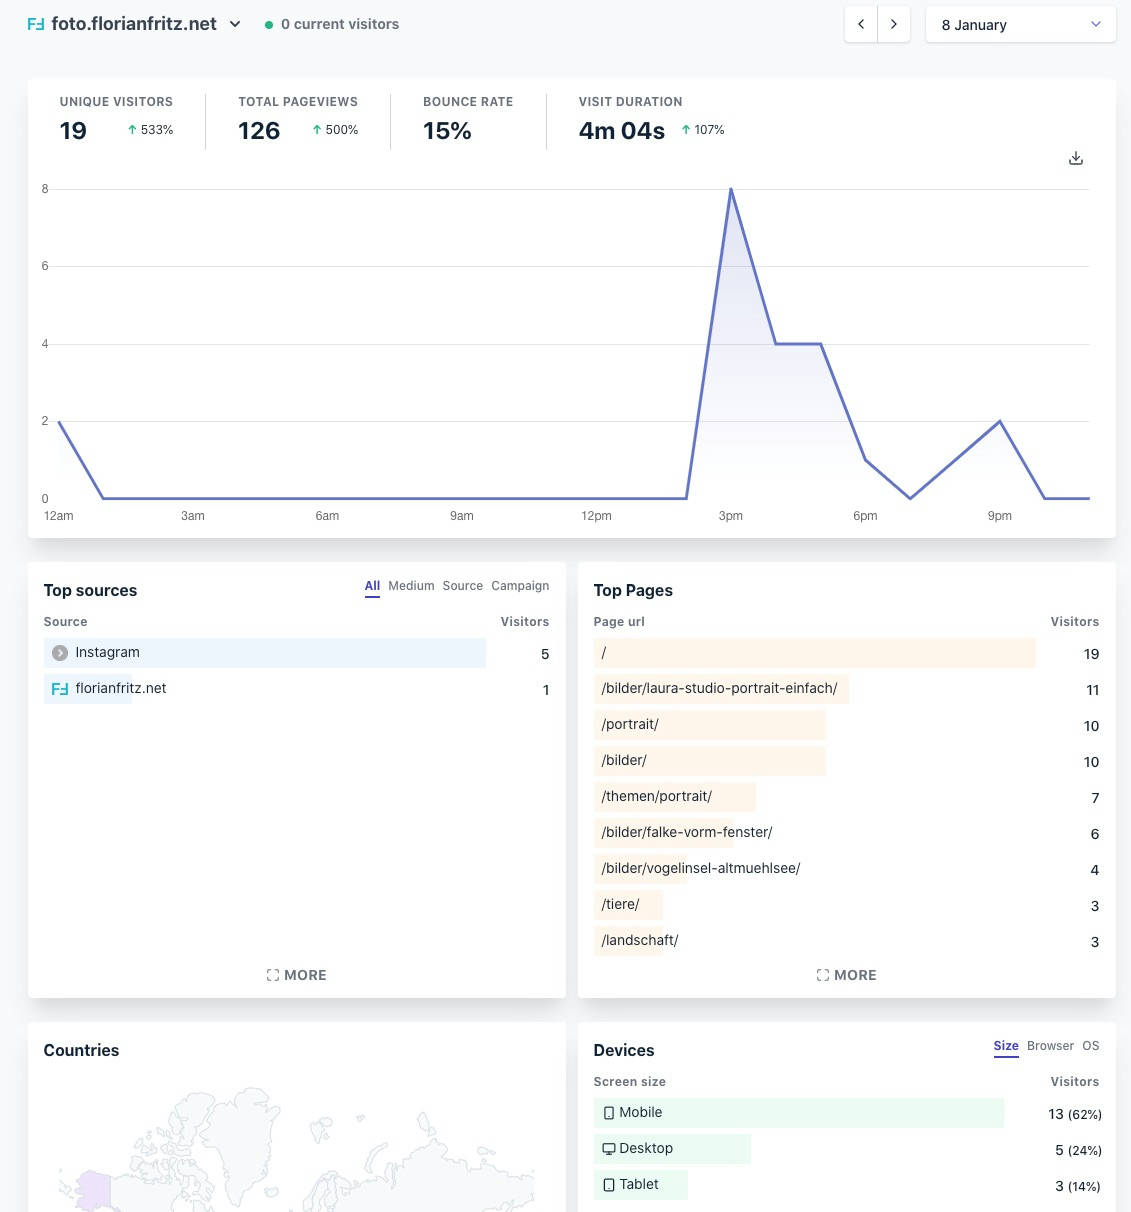
Adding it to the page is as simple as adding a single script to the HTML. What I really liked is their ability to use one of your own subdomains (for me stats.florianfritz.net) to serve this script. That way, you do not get blocked by most adblockers3. Overall, I am happy with the service and supporting its development with a few bucks seems fine.
Closing thoughts
All in all, I really enjoyed building this web presence. It just feels good to create something that people can actually look at and hopefully appreciate. Also, I got to work with HTML/CSS again, brushing up on the technologies.
Currently, I have no comment system on the site. I thought about it, however, I could either choose a very privacy unfriendly service (e.g. Disqus), pay for a privacyfriendly service or spend quite some time somehow integrating an external comment system. If I really add comments, I will probably just link to an external forum (e.g. Reddit). For now, you can email me if you have any feedback or questions (blog@florianfritz.net).
Footnotes
Oh, the web stack, node.js and its dependencies. It was a while since I worked with node. However, when scanning my home directory for my file synchronizing project, I noticed a strange thing: 50% of all files in my home directory reside inside node_modules folders. I really like separate dev environments and a good dependency manager. It can waste some resources in favor of usability. But 50% of ALL MY DOCUMENTS (?!) really seems like a lot.
Having a hard boundary between either fully dynamic languages that are slow, or compiled languages that are faster is often a source of very bad usability. One prime example is C++ and its templating/constexpr: Over time, it became clear that doing computation during compilation is super helpful. However, because of separating between the compiled C++ language and the compile-time template language, users have to learn a whole new language for compile time work. This is frustrating and confusing.
3 ...and can track all the technical people reading your content 😇
Thanks for reading through my post 🤓
Feel free to contact me if you have any feedback (blog@florianfritz.net).